
Last week I got one of my colleagues to install Vmware Workstation and Cisco Catalyst 9800 CL at one of my clients and after 24 hours of configuring and troubleshooting, I finally made it works with APs in FlexConnect mode.
Ciscos documentation on Catalyst 9800 CL and APs in FlexConnect mode is not perfect and I had a lot of challenges during configuration. I have therefore made this recipe for myself and anyone else
First of all. I did not manage to send vlan tagged traffic over the ethernet NIC on my laptop, so I have done a simple configuration on the laptop to make it work.
This network diagram shows all the necessary information about my lab network
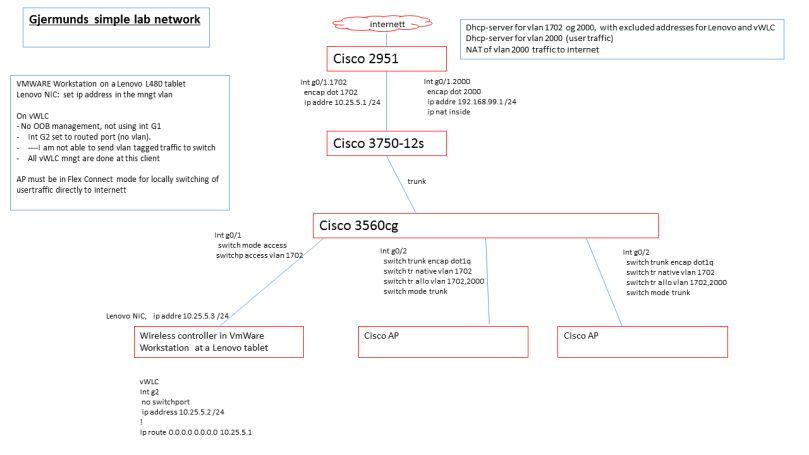
With a Cisco Catalyst 9800 CL as the wireless controller all the APs should be in FlexConnect mode and do local switching at the access point. In my lab network I use vlan 1702 as the native vlan for wireless management traffic and vlan 2000 as the user traffic vlan. This vlan is locally switch at the AP and sent towards the switch in vlan 2000
The switch must be configured as a trunk interface. The network diagram shows the configuration on the switch
Remark: Ciscos documentation does not include the native vlan in the allowed vlan list. Since I followed Cisco recommendation it gave my 7 hours extra troubleshooting.
When the network is up and running like the network diagram and it is possible from the controller to ping the management vlan default gateway it time to connect an AP to the switch. The AP should join the controller in Local Mode after some reboots.
When we want to convert APs from Local Mode to FlexConnect Mode at the Catalyst 9800 CL we must use a set of policies
This recipe is for Cisco Catalyst 9800 CL version 16.10.01
My worklist:
- Configure the WLAN
- Configure the VLANs
- Configure a Site Tag (in CLI)
- Configure a AP profile (AP Join Profile)
- Configure a Flex Profile
- Configure a Policy Profile
- Configure a Policy Tag
- Tie the AP Profile and the Policy Tag to the APs
When this is done the AP reboots and joins again in FlexConnect mode - Associate a client to the WLAN and test traffic
Further on we take it step-by-step
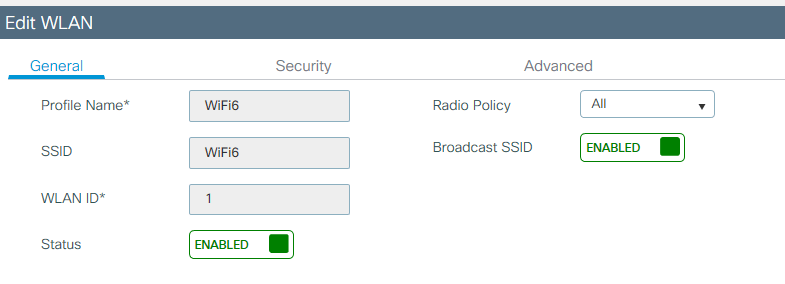
1. Configure WLAN
Configuration, under Tags & Profiles, choose WLANs
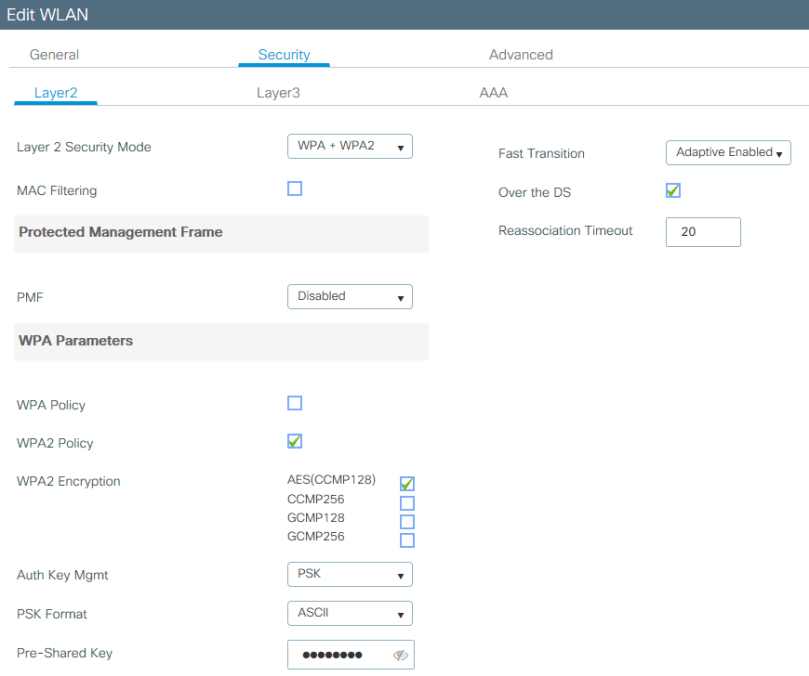
Add a new WLAN. It is pretty simple in two tabs, General and Security
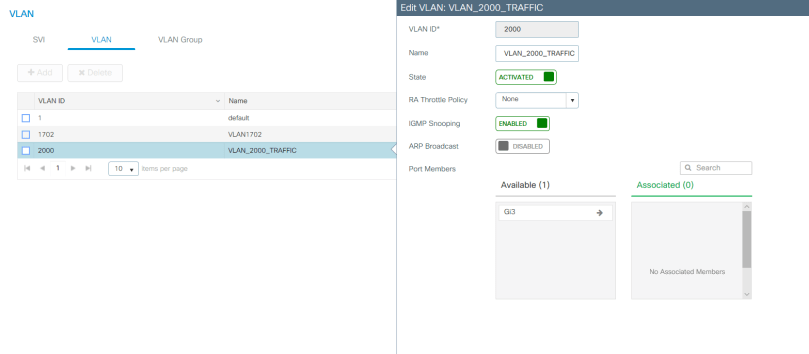
2.Configure VLAN
Configuration, under Layer 2, choose VLAN
Under the tab VLAN, add the vlans in your network (in my network vlan 1702 for management traffic and vlan 2000 for user traffic)
3. Configure a Site Tag (in CLI)
configure terminal
wireless tag site SITE.TAG
desc DEFAULT.SITE.TAG
no local-site
flex-profile FLEX.PROFILE
ap-profile AP.PROFILE
Remarks: Cisco documentation configure “no local-site” as the last item. I had to do it first. This is the command that puts the AP in FlexConnect mode.
The names in capital letters are used later
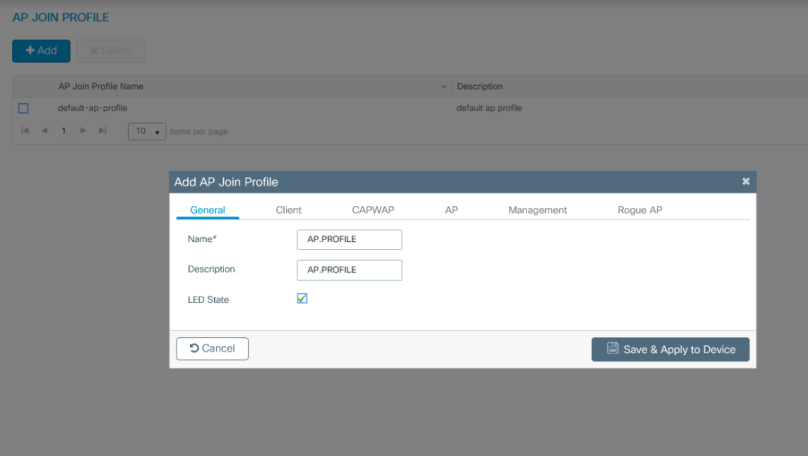
4.Configure a AP Profile
Configuration, under Tags & Profiles, choose AP Join
Add a new AP Join Profile, write the same name as under Site Tags
Set in the profile name in Name and Description (thats all)
Remarks: I did not find anything about this in the Cisco documentation, but the Syslog said that AP Join profile was absent
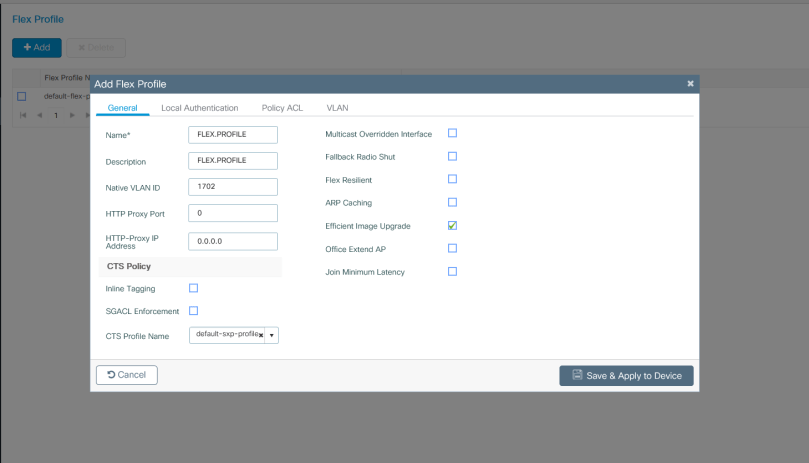
5. Configure a Flex Profile
Configuration, under Tags & Profiles, choose Flex Profile
Add a new Flex profile, use the same Flex Profile name as under Site Tags
Under General: Set in the profile name in Name and Description and the native vlan (management vlan). In my lab: vlan 1702
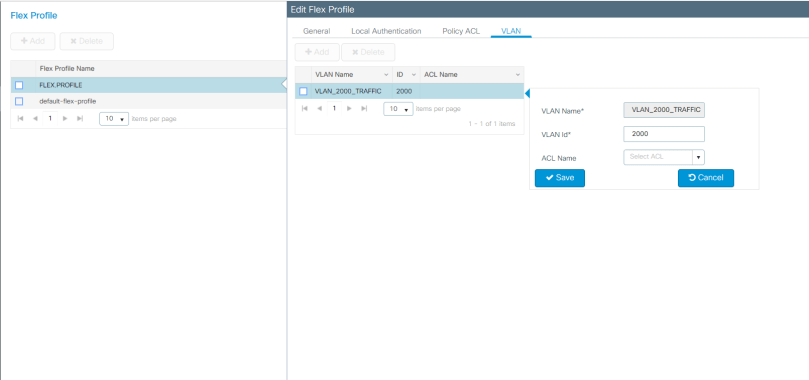
Under the VLAN tab: add the traffic vlan. In my lab vlan 2000
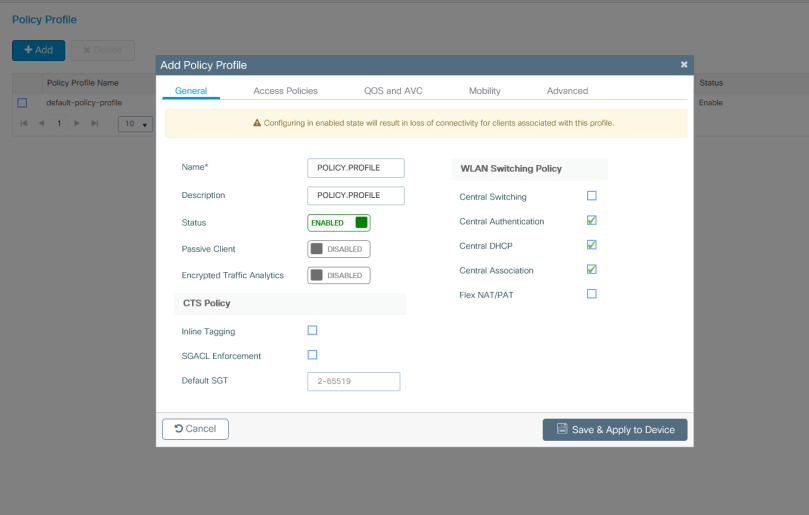
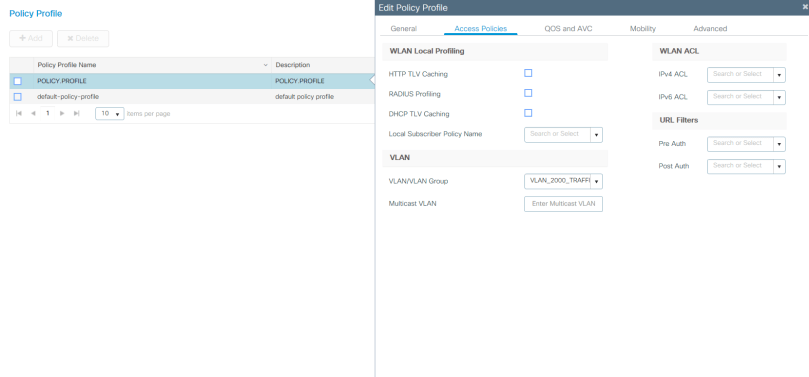
6. Configure a Policy Profile
Configuration, under Tags & Profiles, choose Policy Profile
Add a new Policy profile, the chosen name will be used in the next step
Under the tab General: Set in the profile name in Name and Description, set the Status to Enabled and uncheck Central Switching under WLAN Switching Policy. The last one is for locally switching of user traffic at the AP
Under the tab Access Policies, change VLAN/VLAN Group to the traffic VLAN (in my lab vlan 2000). Note: The VLAN/VLAN group should be assigned with the VLAN number. In my case “2000”.
7. Configure a Policy Tag. Could be done i both CLI and GUI
CLI
wireless tag policy POLICY.TAG
wlan WiFi6 policy POLICY.PROFILE
GUI
Configuration, under Tags & Profiles/ Tags
Add a Policy tag and map the WLAN Profile and the Policy Profile

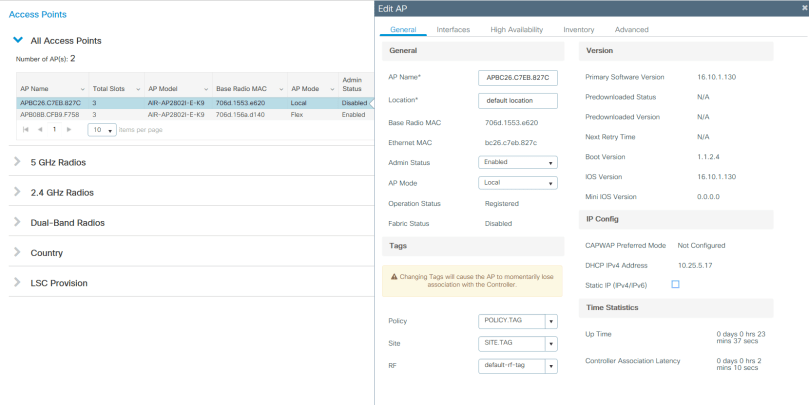
8. Configure AP
Now it’s time to tie those profiles to the AP. The AP is in Local mode when it first joins the controller. When we tie the Profiles to the AP it will reboot and join again in FlexConnect mode.
Configuration, under Wireless, choose Access Points
This first picture shows one AP already in FlexConnect and another in Local Mode (disabled)

Choose the Local Mode AP. Set it to enabled status and choose the configured Policy Tag and Site Tag. It will now, after updating, reboot and rejoin in FlexConnect mode
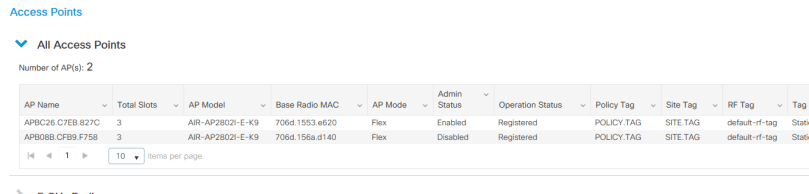
I had to enable the AP it after rejoining in FlexConnect mode
The status after rejoining. The AP that was in FlexConnect is disabled in this example
9. Connect a client
Now is the moment of truth.
Enable WiFi on your client and connect (associate) it to the WLAN. Check your connected ip address and test traffic to the internet or other services
Closing remarks
When you configure you have to use the “Update and Apply to Device”. This button is in the lower right corner in each window. Always wait for some time before the changes is applied to the devices
The Syslog under Troubleshooting is a very good help during this process
And of course, constructive feedbacks are welcome
Other references
It is other blogs that do research into the same area. Two of them are

Thanks for this article. Could you elaborate why you had to configure the site tag in the CLI instead of the GUI please?
LikeLike
The blog was written when I was using v16.10. In v16.12 this function is in GUI under Configuration/Tags/Site. I doesn’t find that in GUI in v16.10. And the documentation was using CLI. That is the only reason. Maybe I should have updated the article. Thank you for the question and using my blog
LikeLike
Hi,
Thanks for your post.
If the WLC in another VLAN, not management VLAN. Can AP join WLC?
LikeLike
Hi, Can you please let me know when we deploy the vWLC on a ESXI host and all APs will be in flexconnect mode with local switching enabled , what will be the port configuration where the server get connected to switch? and why? Can we have server and vWLC in different subnet? Please confirm
LikeLike